
Make your own baby wrap carrier
Baby wearing is pretty much my lifesaver. We wouldn’t leave the house or ever eat dinner if I didn’t wear Rory.
The only problem with baby-wearing is it starts becoming a slight obsession. I KNOW I’m not the only one who wants one of each type; structured carrier, wrap, ring sling, and I’m always asking other Mums about the one they prefer.
I’ve heard some people complain about the cost of the wrap style carriers – because really – they’re just one long piece of fabric. So today I’m showing you how to make your own wrap style, so that you can save your pennies for one of the other types. (Don’t pretend you haven’t also be eyeing off those Sakura Bloom Slings!)
What you need:
2m of 150cm stretchy fabric (natural, non-slippery cottons are better)
Basically you are making a length of fabric that is about 50cm at it’s widest, 5.8m long and tapers off at each end.
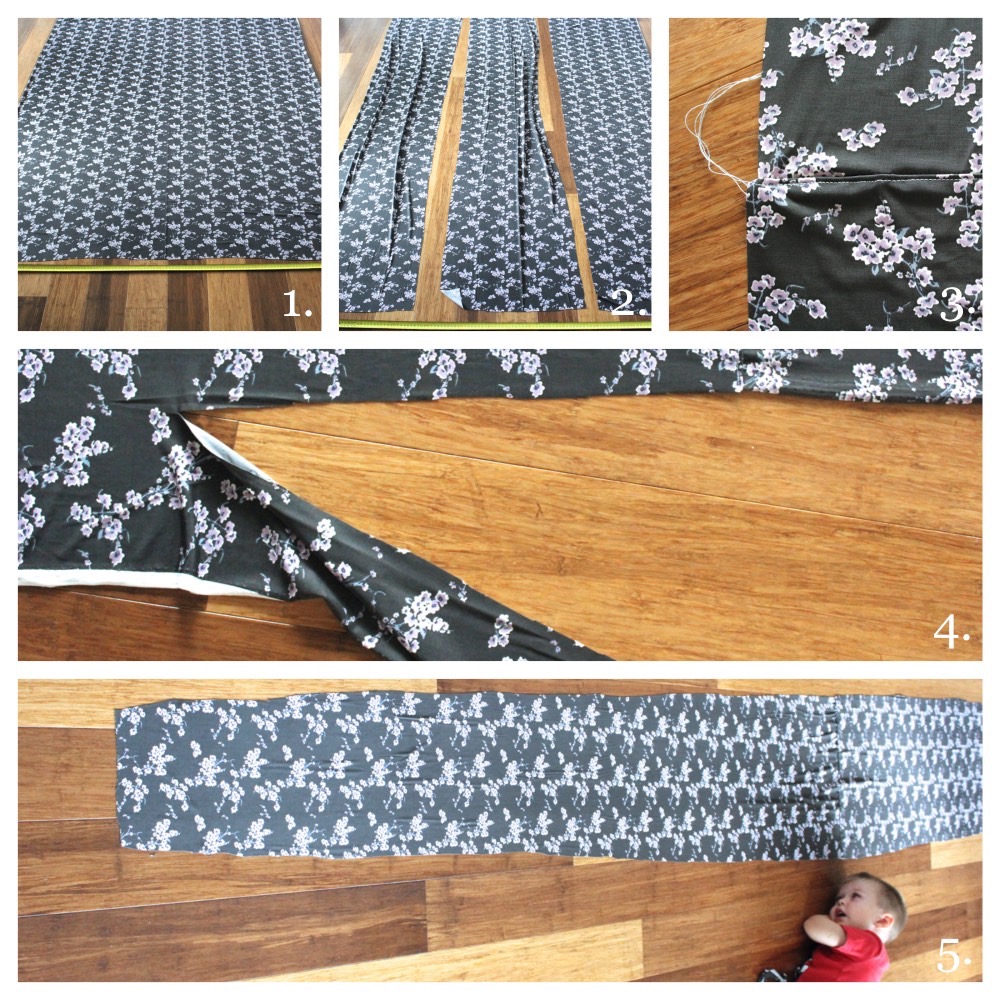
1. Lay a tape measure out and roughly mark 50cm along the width. (It doesn’t have to be perfect, we’ll be free-hand tapering it later anyway).
2. Cut your fabric into 3 long strips.
3. With right sides together sew the ends of each length together and top stitch the seam for strength. Because we are only roughly marking, you may find the edges don’t match up perfectly. That’s fine, we will cut it off later.
4. Lay your fabric down and trim the excess fabric so that it is more or less a straight length of fabric. Trim each end so the entire length is 5.8m)
5. Starting on each end, cut on the angle towards the middle to make each end thinner than the middle. (These are the bits that tie so you don’t need as much fabric here as in the middle).
NB. You could hem the entire piece you like but as its jersey it shouldn’t fray.
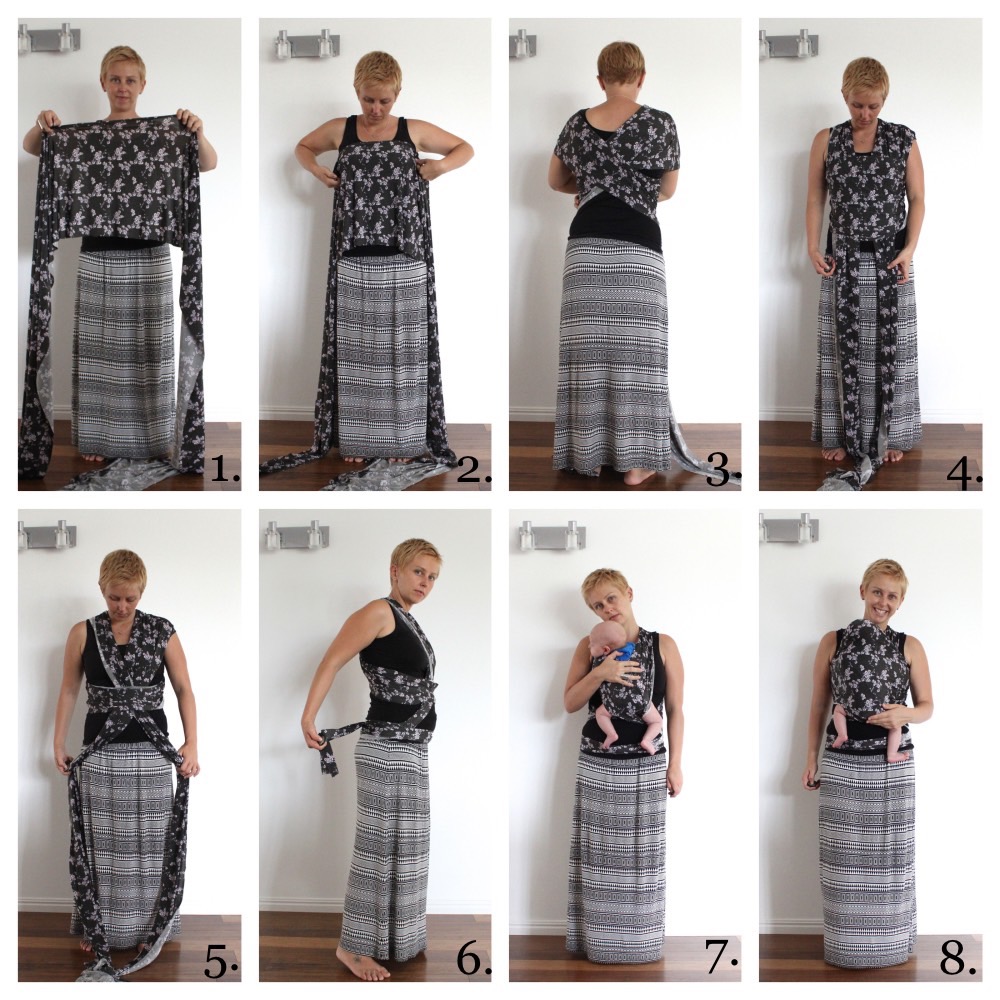
Take a few times practicing how to tie with a teddy or whilst bub is happy. It may feel difficult at first but becomes easy, I promise!
1. Find the middle of the fabric.
2. Take the fabric across your chest and under your arms.
3. Cross the fabric behind you and bring it back over your shoulders.
4. Ball the fabric up and pass it under the flat piece at the front.
5. Cross the fabric in front of you again. (This will form the seat baby sits in. For newborns you will need the cross above your belly button, but will need to cross lower to allow room as baby grows.)
6. Take the wrap behind and cross, in front and cross and finally behind and tie off with a double knot.
7. Pull the front flat piece down and place baby in the ‘seat’ made by the first cross.
8. Pull the flat piece back up to support baby’s head. (You may like to leave newborns feet ‘frogged up’ against you and under that front piece.)
That’s it! Just remember to tie your wrap tight enough that your baby’s head sits high on your chest. You should be able to kiss the top of their head)
Remember to tag me if you make your own baby wrap carrier, I’d love to see!